SILO 6.2 (DRAFT)Year 6, Term 2: RoboticsFocus: Robotics Scope
and sequence: Machine
learning
|
|
Learning intention: Students use coding and electric sensors to interact with electronic devices. |
|
|
NSW Syllabus
|
Australian Curriculum
(version 9.0)
|
|
"A student explains how digital
systems represent data, connect together to form networks and
transmit data." (ST3-11DI-T)
|
"Students learn to explain how
electrical energy can be transformed into movement, sound or
light in a product or system." (AC9TDE6K02)
|
Introduction to robotics
This unit extends the application of block-based coding through the use of sensors to explore robotics and artificial intelligence. The following video (2:57) explains four components which are common to all robots, namely:
- Mechanical parts
- Sensors
- Power supply
- Controller
Acceleration and accelerometers
This video (5:48) explains acceleration and accelerometers
using examples from smartphones. An activity towards the end shows how
this technology can be applied to making a digital dice using a
micro:bit.
Light detection
A micro:bit can be used to measure light as shown in this
video (5:17).
Using LEDs
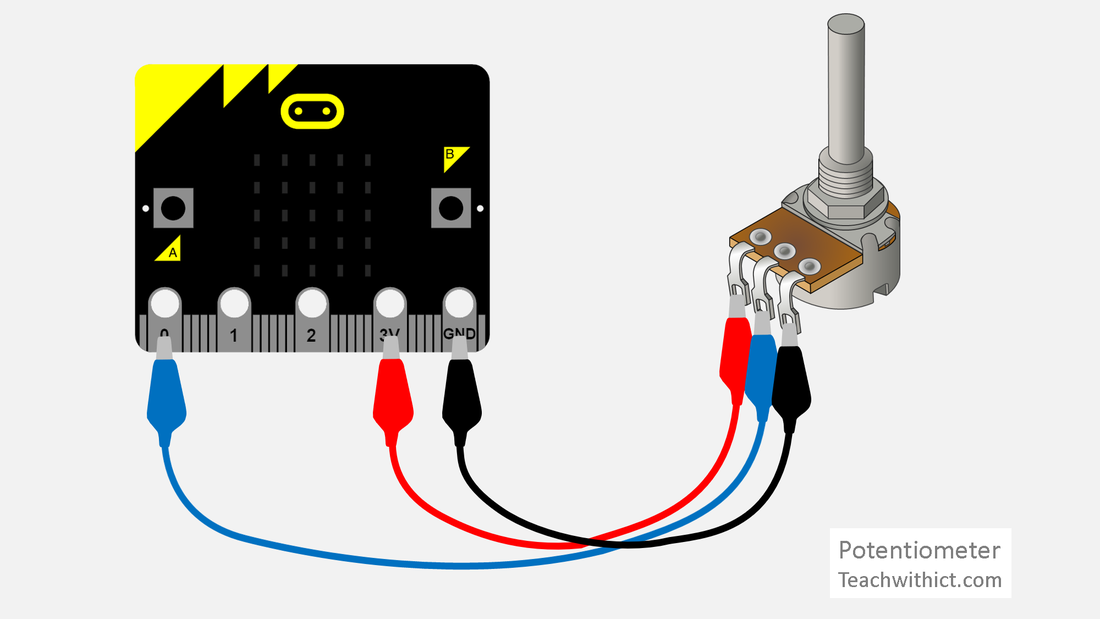
Potentiometers
Note: This is an extension of an activity which was first introduced in SILO 4.3 'Sensors'.
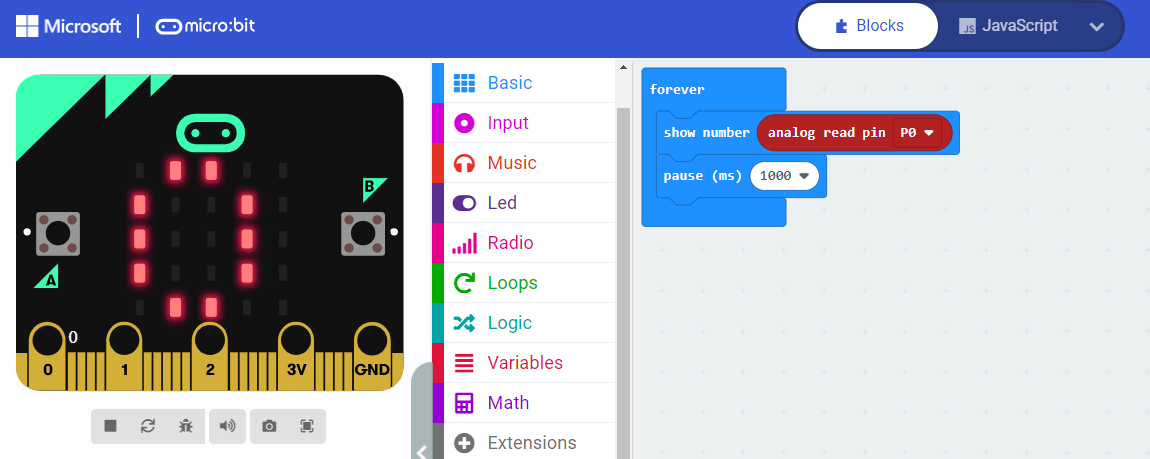
By using the following code, the simulator will display the resistance on a scale of 0 to 1023 if you drag your cursor along Pin 0 on the bottom left-hand side.

Connecting two micro:bits together
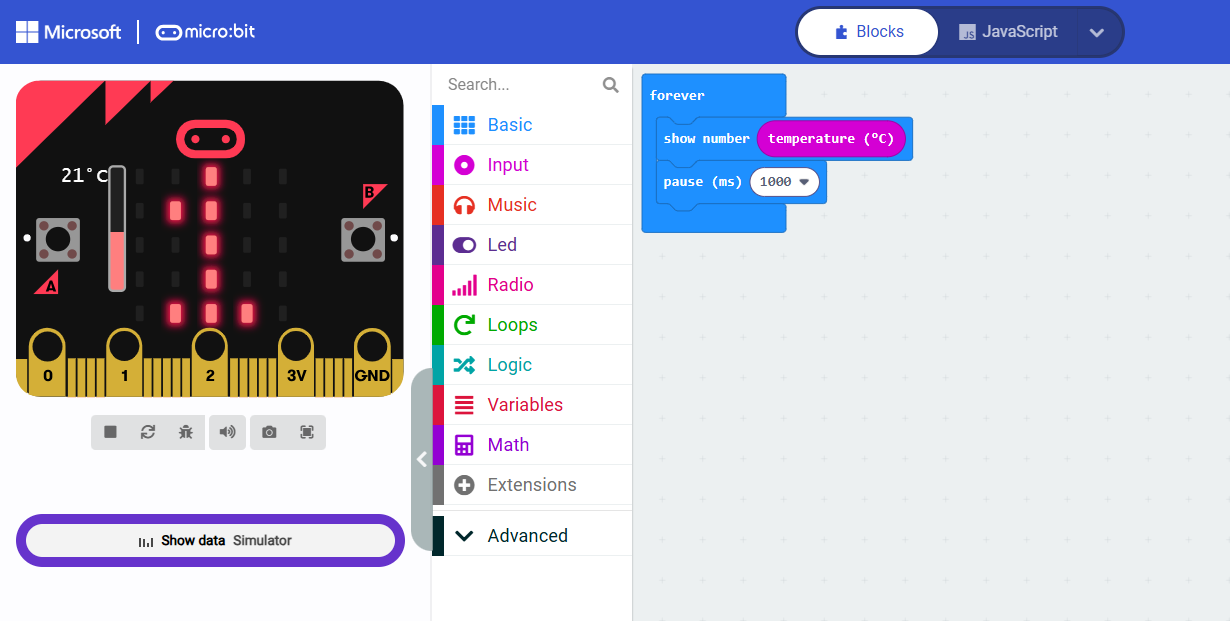
The following video (8:30) includes extensive technical advice about browsers and firmware so feel free to skip ahead to focus on the pedagogical points about connectivity. In the end you will be able to measure and graph temperature in real time.
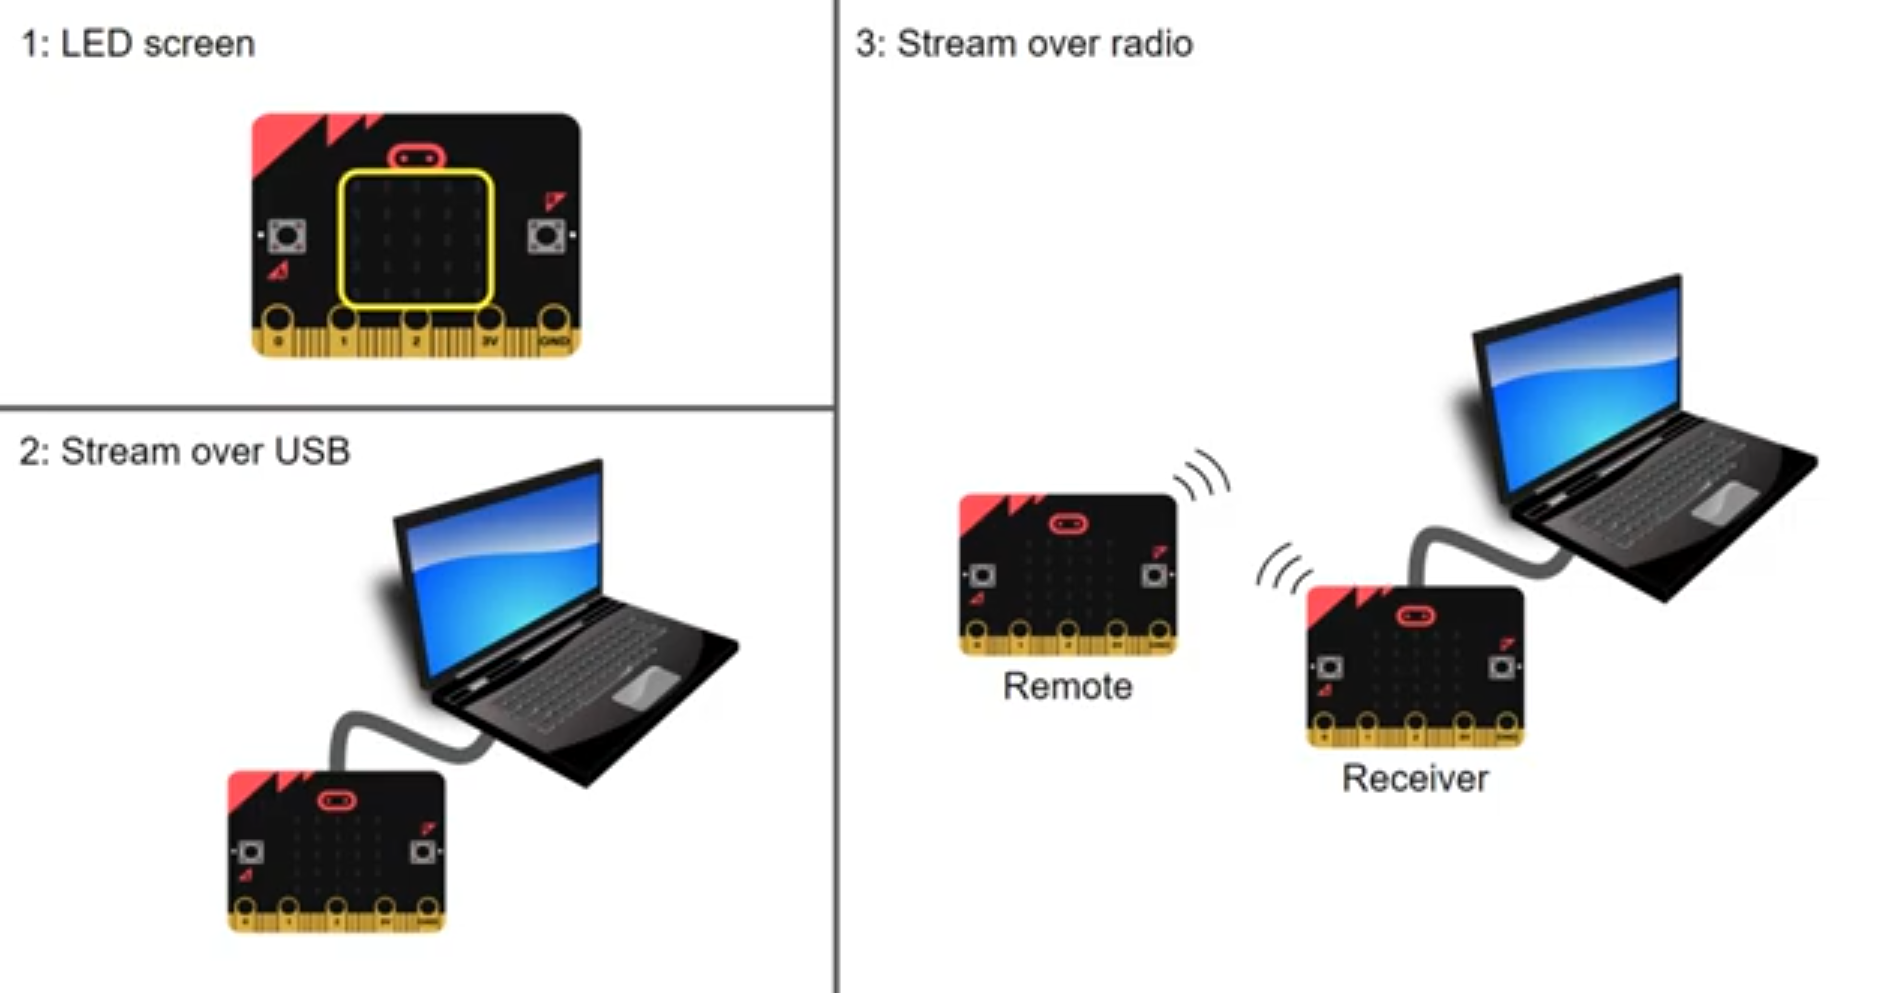
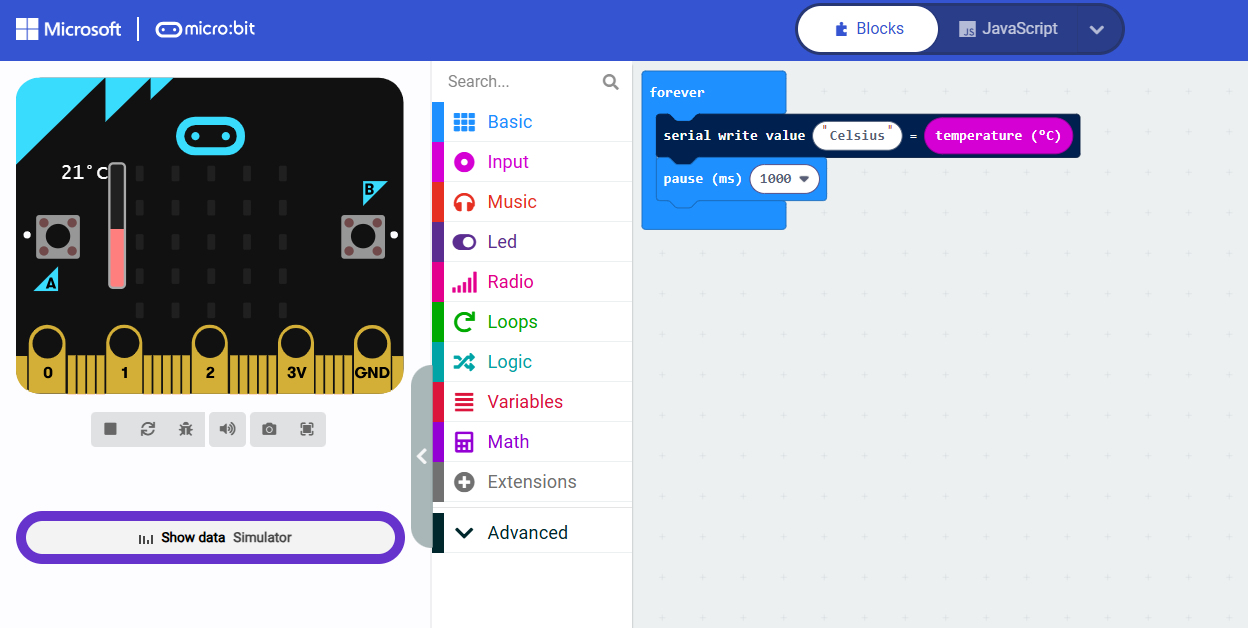
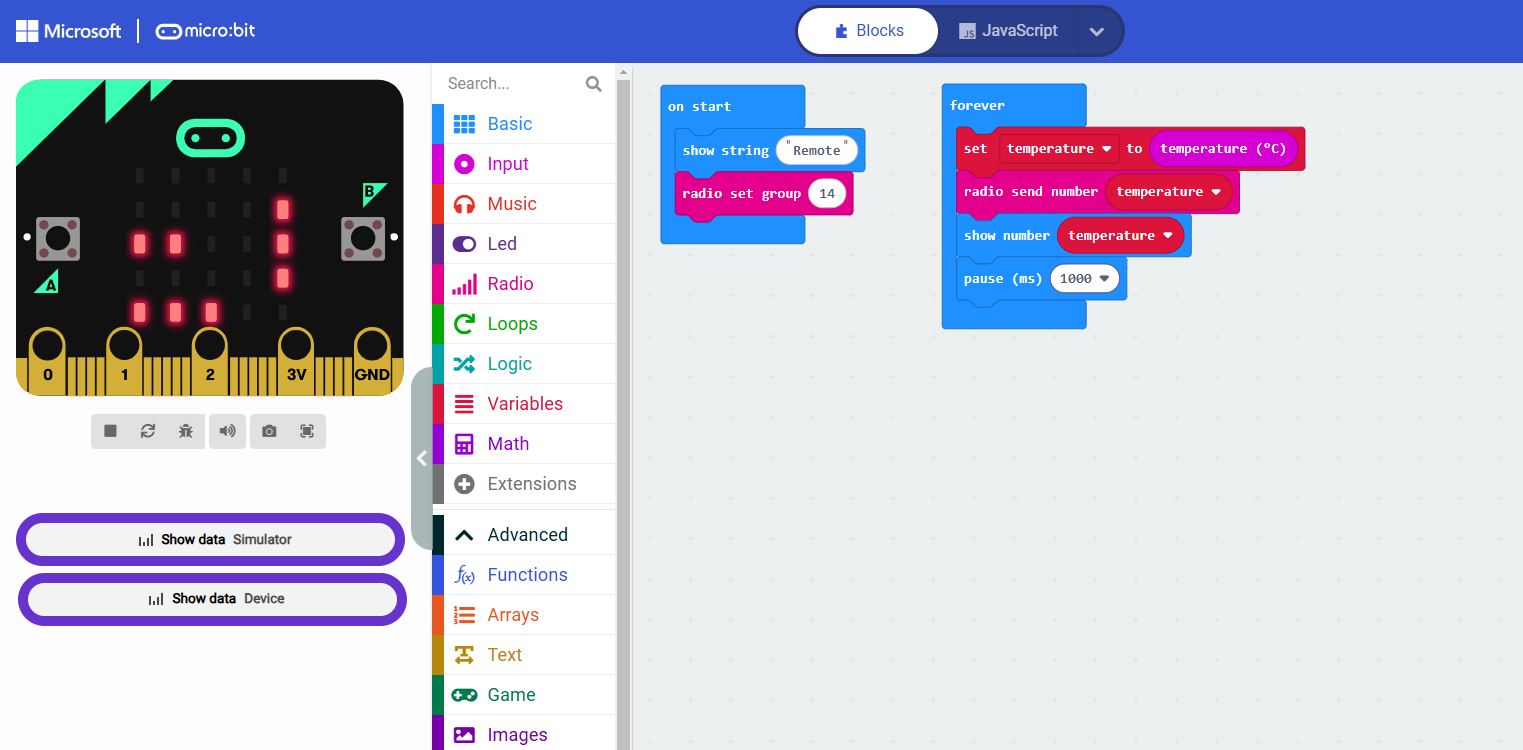
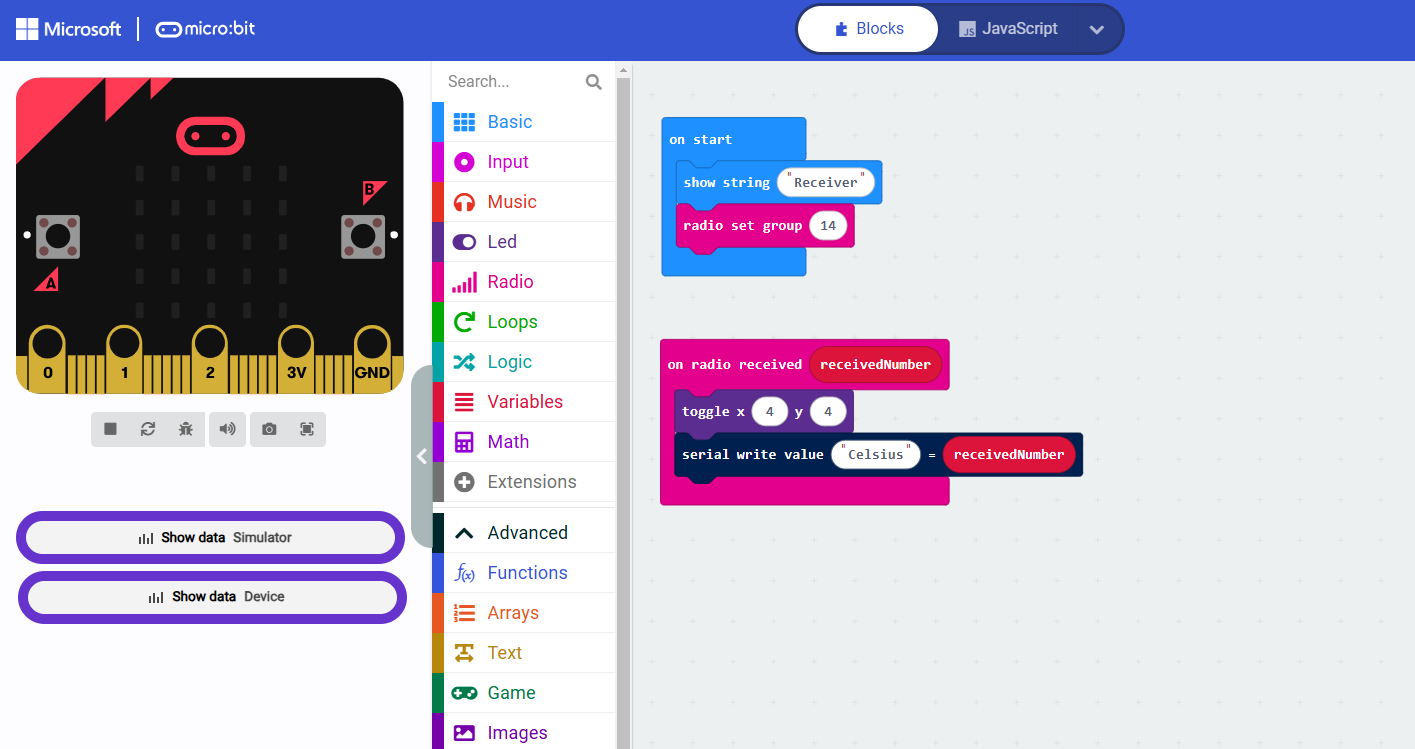
The following screenshot shows three ways in which a micro:bit can sense and display temperature.
Here are screenshots of the code from this
video as it moves pretty fast.
1. LED screen
2. Stream over USB
3. Stream over radio - Remote
3. Stream over radio - Receiver
Using electric motors as generators to measure airflow
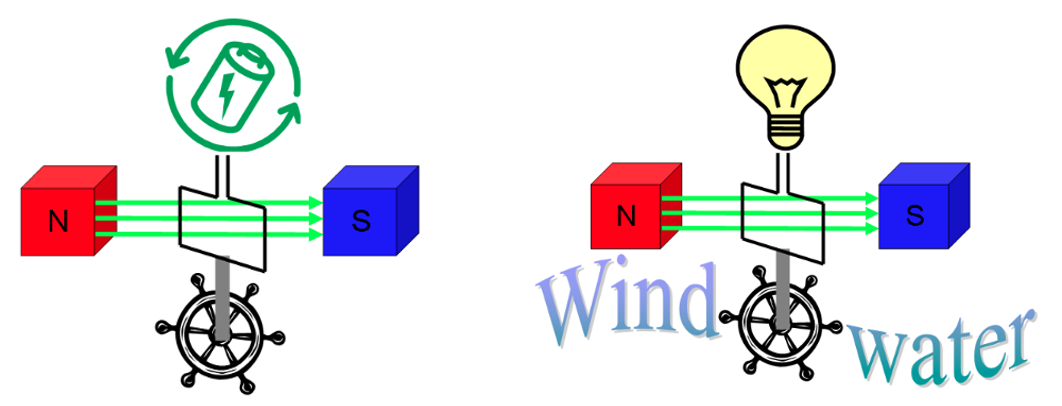
In SILO 5.4 'Electronics' there was an animation made by a student which showed how the components in an electric motor are basically the same as those used in an electrical generator. The screenshot from that animation below shows that an electric motor requires electric current to turn a shaft, but a generator uses mechanical energy to turn the shaft which then transforms the mechanical energy into electrical energy.
The following video (5:13) featuring students from Drummond Memorial School shows how electric motors can be used as generators to measure airflow when connected to a micro:bit.
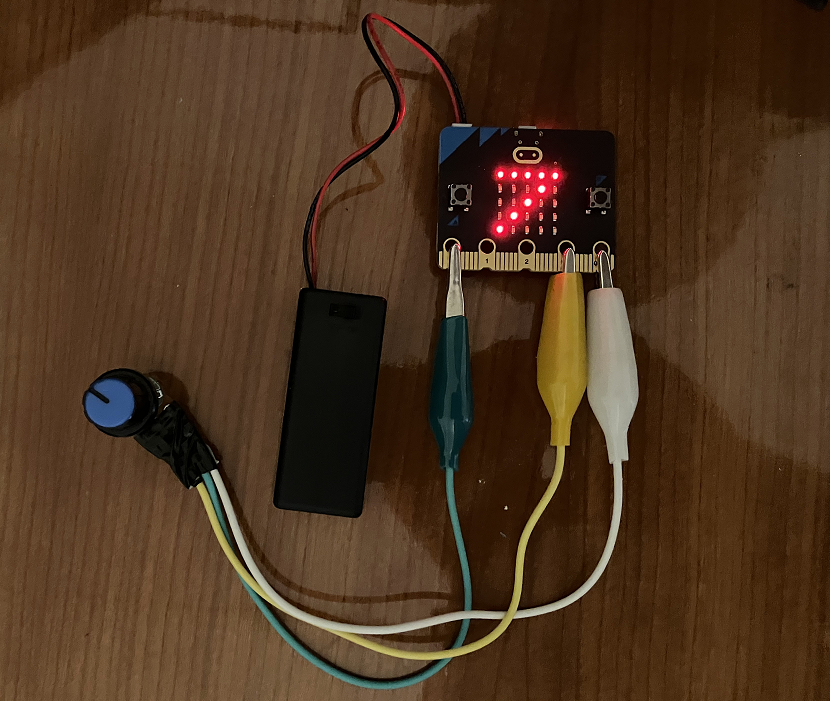
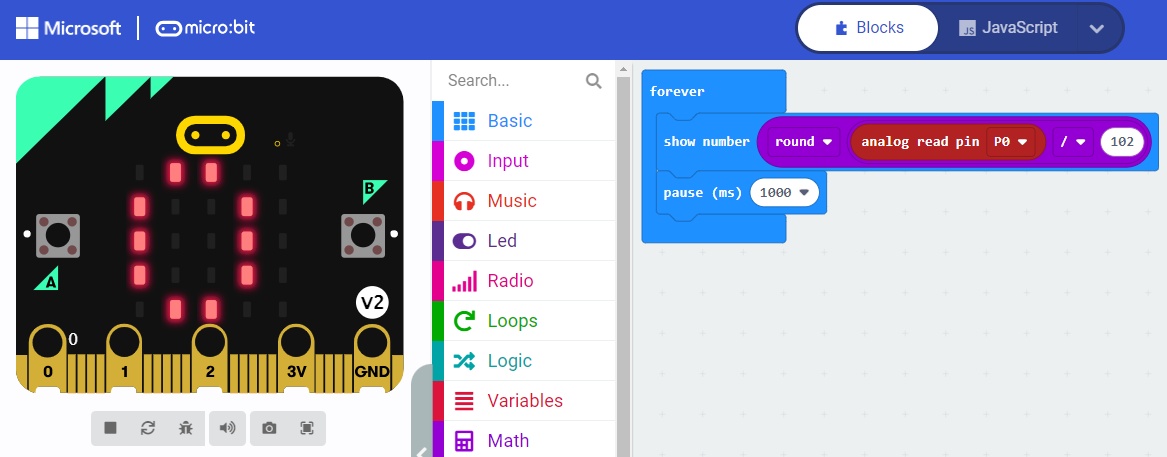
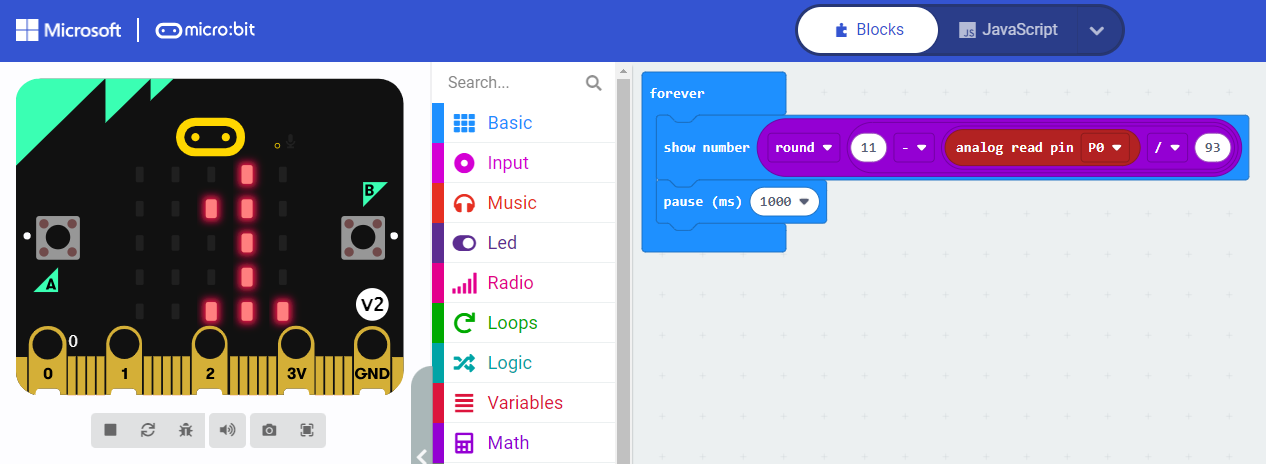
Rotating shaft challenge
Turning the shaft of an electric motor can convert mechanical energy into electrical energy. This is an example of the motor functioning as a generator. You would need a multimeter to measure the current that a small motor can produce, but you can measure the voltage with a micro:bit.
 |
|
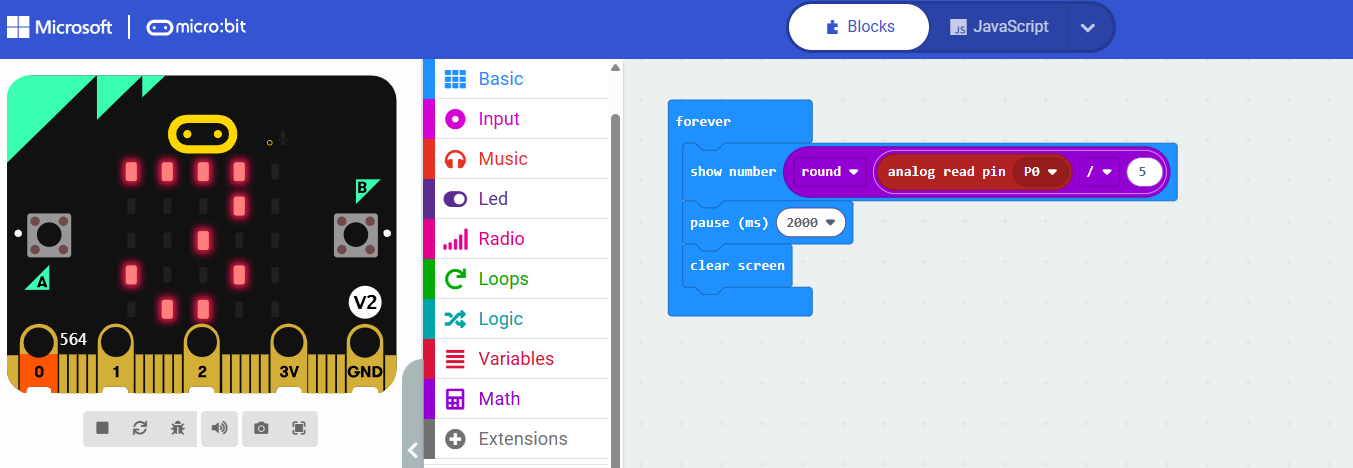
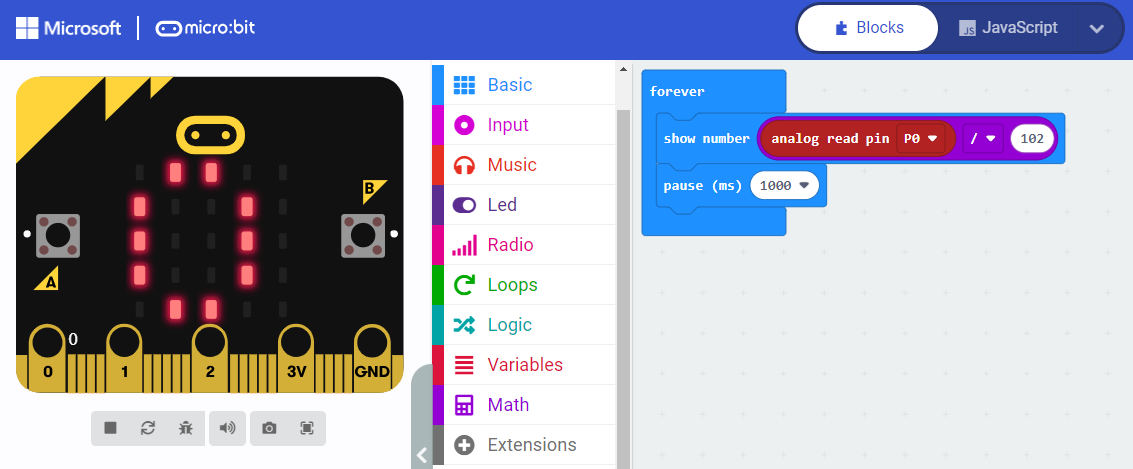
- The 'analog read pin' is found under 'Advanced' and then 'Pins'.
- The 'analog read pin' can be tricky as we found that it doesn't always replace the number in the 'Round' block. We found that it works best to combine the two math blocks and then add the 'Analog read pin' block. You might need to try reconnecting (i.e., connecting and then disconnecting) the blocks until they join correctly.
- The actual voltage should be somewhere around 50mV but the micro:bit displays the output on a scale between 0 and 1023. By dividing this number by 5 it becomes easier to read and compare.
Artificial Intelligence (AI)
A key component of both natural and artificial intelligence is the ability to learn. The photo below involves an animal that is learning to adapt to its environment.
 |
Can anyone tell what is happening in the photo below? |

This photo show a possum hanging upside down in regional New South Wales, Australia. The possum is demonstrating its intelligence by adapting to the recent installation of security lights. The small white object on the left of the possum is a moth which is attracted to the light. The possum hangs upside down to activate the light which then attracts unsuspecting moths which fly towards the silently waiting possum. Similarly, AI finds structure and regularities in events to acquire and develop skills. A big part of this is machine learning.
Machine learning using the micro:bit
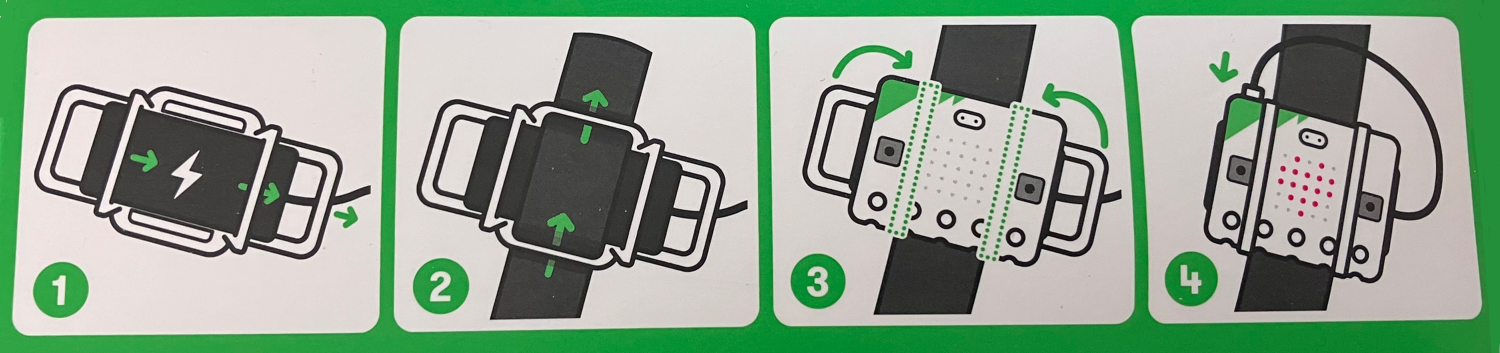
Connecting a micro:bit to a moving person or object can open up some interesting possibilities using machine learning. You could use string and/or tape but there are also commercial options available such as the micro:bit wearable. The following image provides instructions for the micro:bit wearable.
The following video (6:23) titled Getting started with micro:bit CreateAI shows some examples of how this can be achieved in the classroom. Step by step instructions are available at https://createai.microbit.org/.
Moderated self-assessment
Discussions with students around the key components of conceptual topics and how they fit together can generate insights into student achievement.


This work is licensed under a Creative Commons Attribution-NonCommercial-ShareAlike 4.0 International License.
Main menu