|
SILO 2.2 (DRAFT)Year 2, Term 2: Construction zoneScope and sequence: MechanismsFocus: Problem solving |
|
Learning
intention: Students
use materials, tools and equipment to develop solutions for
a need or opportunity.
|
|
|
NSW Syllabus
|
Australian Curriculum
|
|
"A
student uses materials, tools and equipment to develop
solutions for a need or opportunity" (ST1-2DP-T).
|
"Students
learn to use materials, components, tools, equipment and
techniques to safely make designed solutions" (AC9TDE2P02).
|

Introduction
to the construction zone
Rube Goldberg machines
Rube Goldberg machines.are named after cartoonist Rube Goldberg. They are intentionally over-engineered contraptions designed to perform a simple task through a chain reaction of complex, often humorous steps. They often use simple machines. You can learn more about these in SILO 4.1 'Simple machines'. The following video (1:08) set a world record for being the largest Rube Goldberg machine to feature only pieces from a household air-conditioning unit.
 |
What does it mean to be over-engineered? |
Investigating shapes

(Image source https://www.pickpik.com/paris-transmission-tower-building-national-culture-france-eiffel-tower-124132)
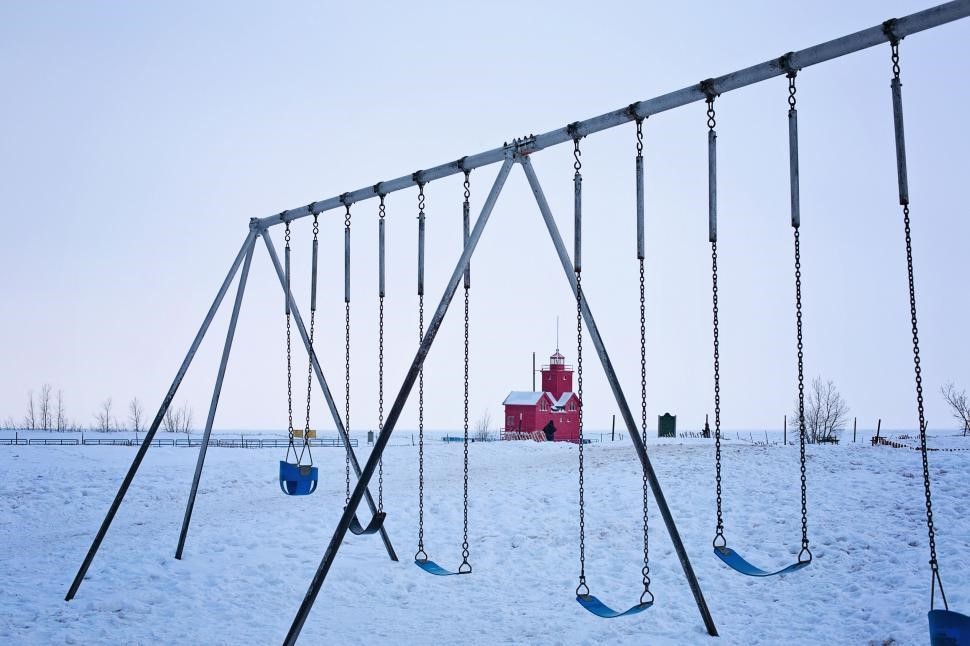
(Image source https://freerangestock.com/photos/134469/swings-in-park-.html)

(Image source https://www.rawpixel.com/image/5925047/photo-image-public-domain-free-building)

(Image source https://pxhere.com/en/photo/1636227#google_vignette)
Building 3D objects
 |
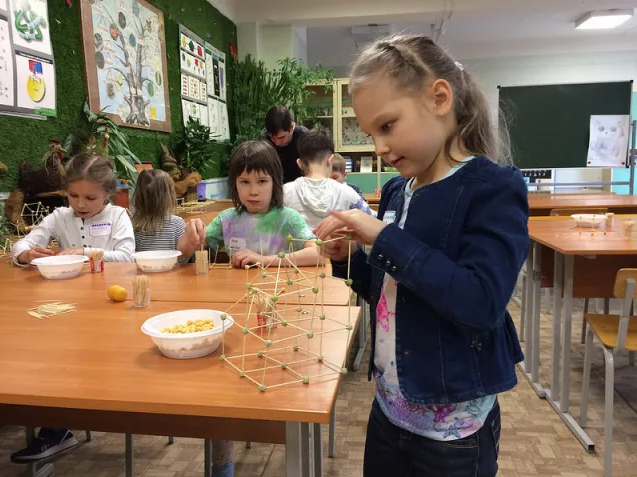
Toothpick and chickpea activity |
Chickpeas work really well as connectors for toothpicks. For best results, soak dry chickpeas in water overnight as canned chickpeas are usually too soft and can break apart.
 |
Design challenge |
|
|
What is an engineer?
This short video (4:29) provides an introduction to
engineering and what it means to be an engineer.
Building bridges
Does anyone know what a bridge is? Can anyone name any
famous bridges? Can you identify what features most major bridges
contain that was discussed in an earlier week (answer, triangles)?
Remember earlier in this unit when we learned about engineers? One type
of engineer is a civil engineer. These engineers are responsible for
building stable structures – for example, bridges!
The following video (3:45) from SciShow Kids discusses what makes bridges strong.
The following video (3:51) Deysi from Design Squad Global talks about the strength of using triangles in your engineering designs.
|
Building bridges |
Students will endeavour to test this shape theory with the addition of weights. Their goal will be to build a bridge that can withstand a downwards force acting on it. Students will have 20 minutes to build their structure and then we will test each bridge by placing its ends on an elevated surface and layering weights such as books on top until the structure fails. The bridge that remains standing the longest is the winner.
|
|
|
Popsicle stick challenge |
We have learned about building bridges using the strongest shape which were triangles. Does anyone remember what we used to fasten the toothpicks together earlier in this unit? That’s right, chickpeas! How did the chickpeas hold the toothpicks together? For the popsicle stick challenge we are going to use force to hold together a different type of material, that is even stronger than the toothpicks from before – popsicle sticks!
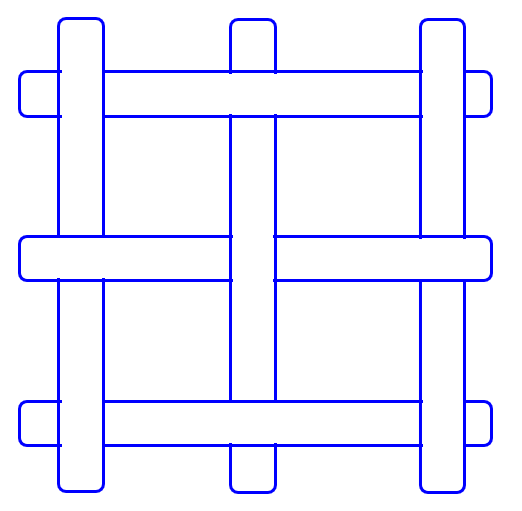
PART 1: Everyone is going to create a structure by weaving together a handful of popsicle sticks. The outline of the panels we are creating have already been put together, using PIN JOINTS to keep the corners in place; your task is to weave popsicle sticks through the center to strengthen the panel through reinforcement which will STABILISE the structure.
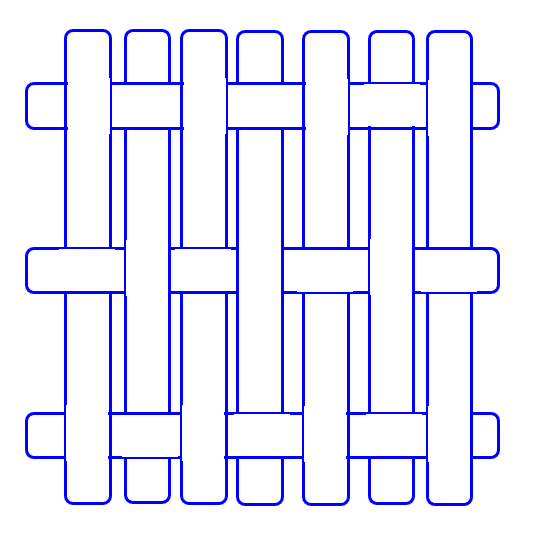
The first structure (shown in blue) can can
made using six popsicle sticks. This can then be extended into a
stronger shape (shown in red) using a total of ten popsicle
sticks.

LEARNING POINT:
Wait – with no glue, how are these two center pieces going to stick
to the rest of the panel? Well, each popsicle stick is going to be
supporting the other by applying a force that is opposite to the
next touch point.

Have everyone stack their panels in a way that creates a bridge using cable ties as a means of holding them together. See the example image below.
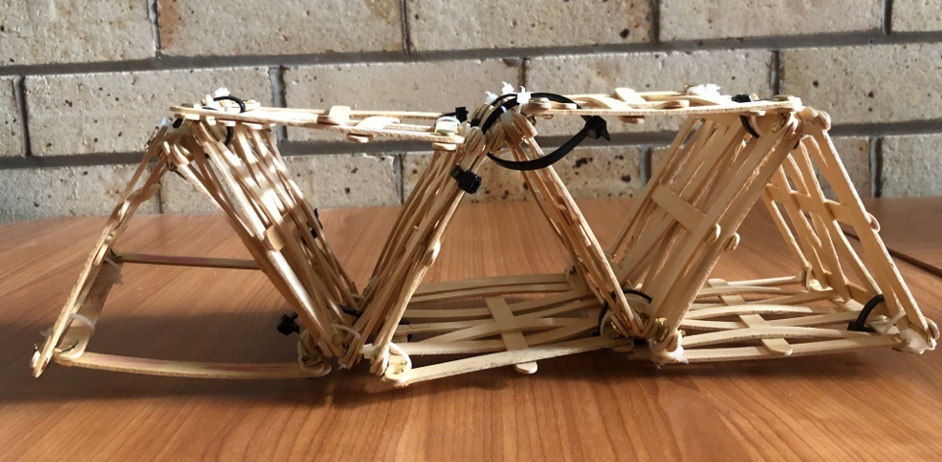
Once the bridge is finished, the class can test the strength in a similar way to how the toothpick bridges were tested, to prove the increased strength of the popsicle sticks.This activity demonstrated one way cable ties are useful in linking objects together. Cable ties are also very useful in the design cycle.
|
There is an old saying that, "A chain is only as strong as its weakest link". What does this mean? |
|
There is another saying advising us to, "Measure twice, cut once". What does this mean? |
|
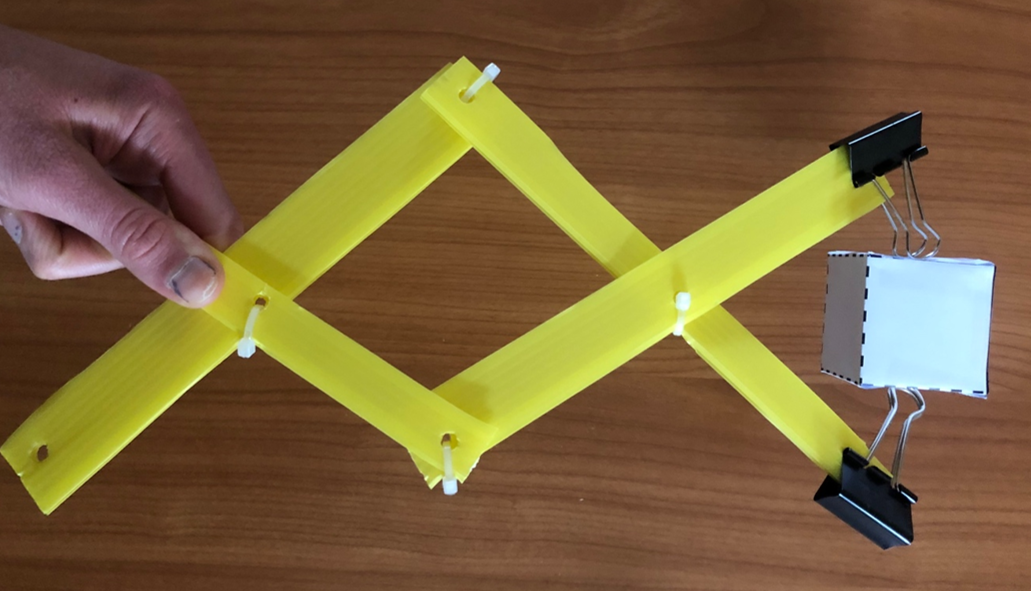
Making scissor arms |
- 4 hole-punched plastic arm pieces
- Cable ties
- Pin joints
- Bulldog clips
- Binder clips
*Give students 20 minutes to build their scissor arm*
Now that everyone is done building their machines, we are going to test
them! Your goal is to move as many of the 3D blocks from one desk to the
other desk, without dropping them or damaging their shape.
 |
Which
fastening mechanisms were most effective – pin joints or
cable ties?
|
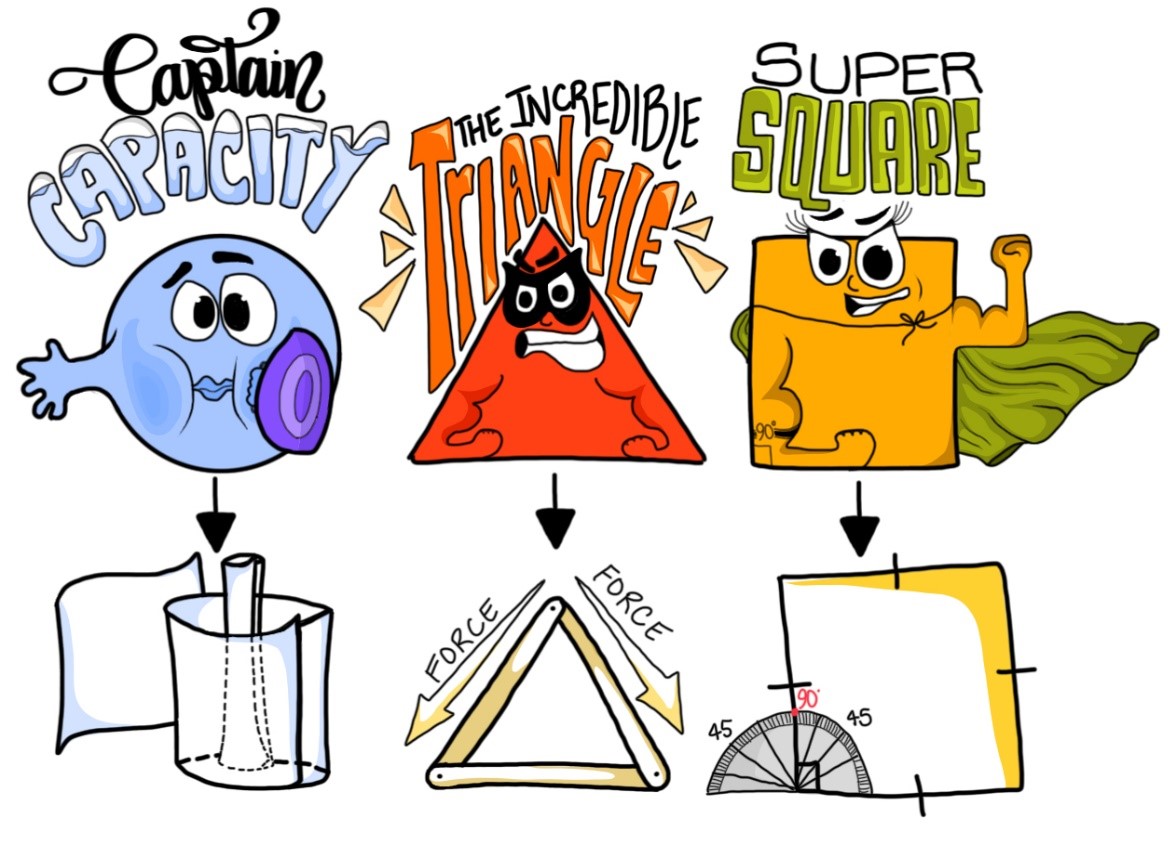
Shapes and their superpowers
Squares
In SILO 2.1 'Shapes and objects' we learned about the properties of circles and how this also applies to cylinders. Earlier in SILO 2.2 'Construction zone' we learned about triangles. Now it is time to look a squares and the idea of being 'square'. Although a square does not have the same structural strength as a triangle, squares are everywhere in classrooms, tables and even boxes thanks to the symmetrical properties of the 90-degree angle. The idea of a building being ‘square’ is a fundamental concept in the construction industry.
Mechanisms and linkages
|
Create mechanisms to change the direction of movement using split pins as fixed and floating pivots
|
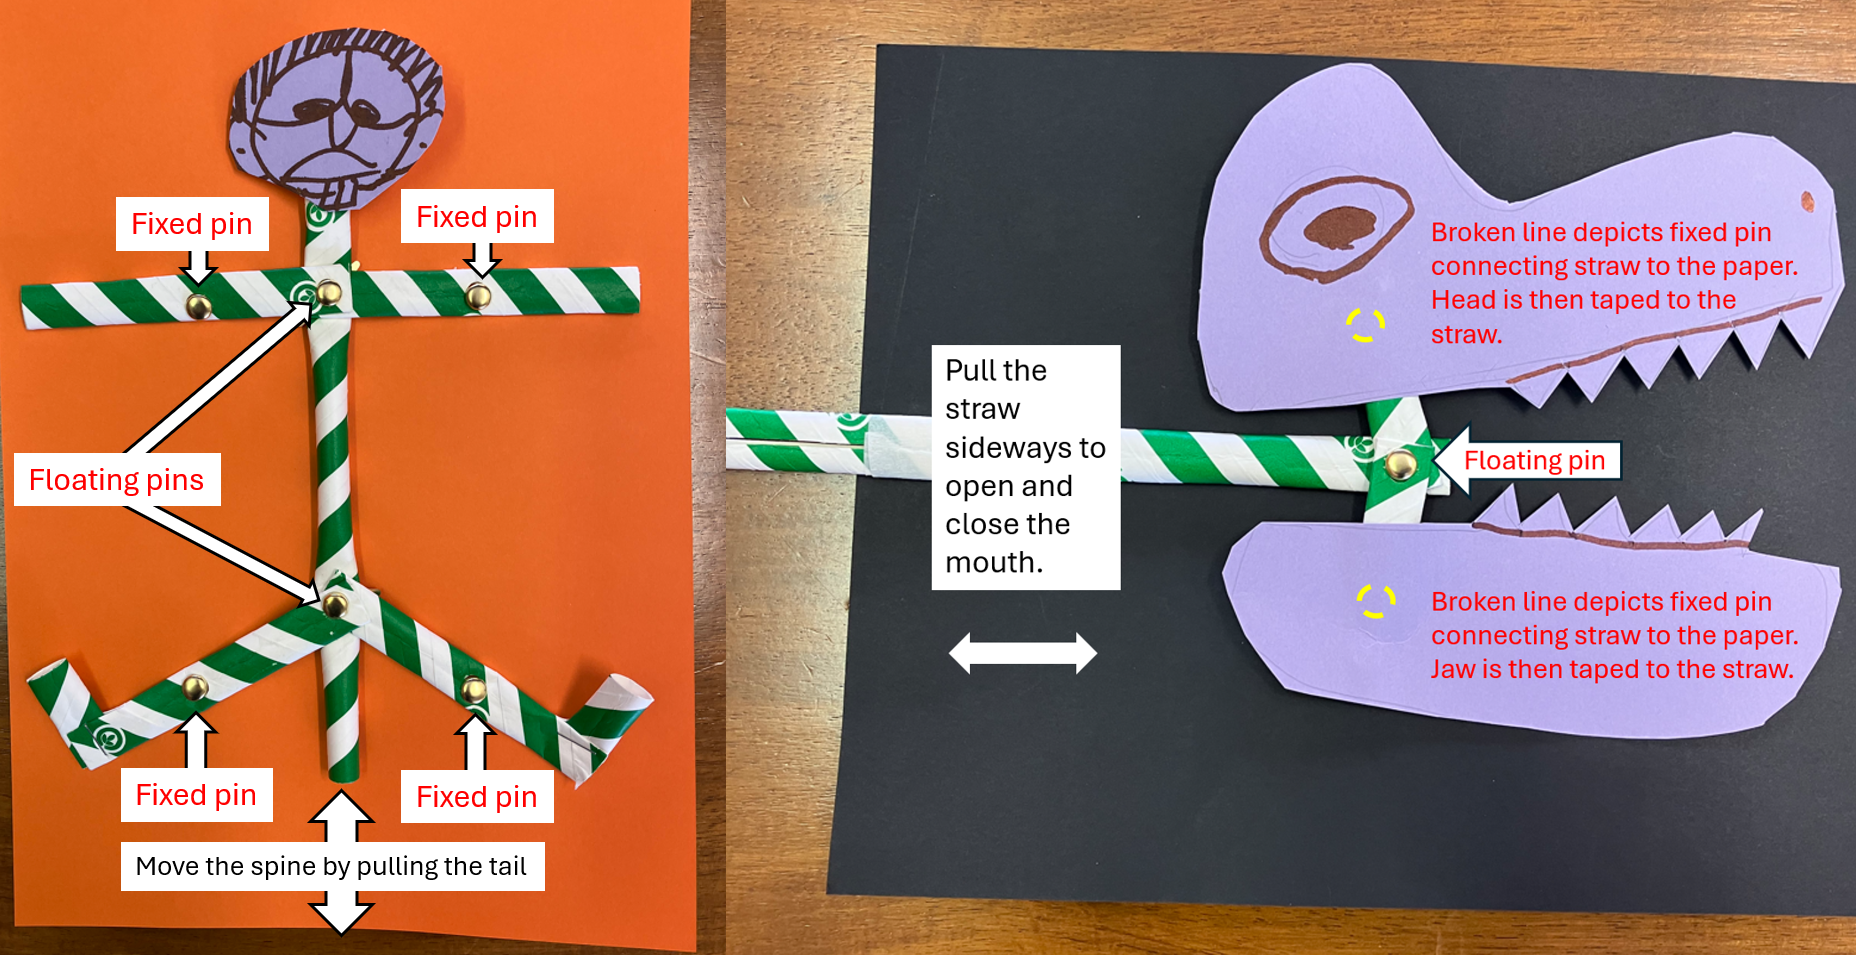
Notes: The stick figure can also be made using a cardboard tube or disposable cup instead of the card stock. This will make the end product more like a toy.
 |
|
More ideas for classroom construction projects
Moderated self-assessment
Discussions with students around the key components of conceptual topics and how they fit together can generate insights into student achievement.
We welcome your feedback and suggestions
The chief investigator for The SILO Project is Associate Professor Brendan Jacobs, Head of Department STEM Education, University of New England. The SILO Project thrives on incremental improvement so constructive feedback is greatly appreciated. Please contact Brendan via email at bjacobs7@une.edu.au to share your thoughts and recommendations.

This work is licensed under a Creative Commons Attribution-NonCommercial-ShareAlike 4.0 International License
Main menu